Archive for the ‘Recipes’ Category

Ranch Dressing

Wednesday, April 6th, 2011


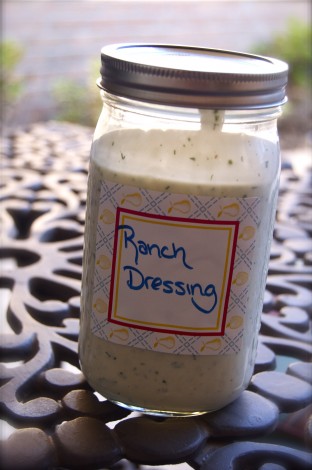
I made this last weekend for the pot luck at church and it turned out very good. I’m not a big fan of goopy ranch, it kind of makes me want to gag. This recipe makes a nice, fresh, thin ranch dressing that tasted great on a salad. It was relatively easy to make too. The original recipe actually calls for less herbs, but I messed up when I made it and actually liked the extra herby flavor. You may start out with fewer herbs and add to taste.

Ranch Dressing
adapted from Serious Eats
1/2 cup buttermilk
1/2 cup sour cream
1/2 cup mayonaise
1 tablespoon finely chopped fresh parsley
1 tablespoon finely chopped fresh chives
1 tablespoon finely chopped fresh dill
2 teaspoons freshly squeezed lemon juice
1 teaspoon Dijon mustard
1/2 teaspoon onion powder
1/2 teaspoon salt
1/8 teaspoon black pepper

Mix the buttermilk, sour cream and mayonaise together in a bowl with a wisk. Pour in the parsley, chives, dill, lemon juice, Dijon, onion powder, salt and pepper. Whisk together. Taste and make sure it is to your liking and add more herbs or lemon juice if needed. Place in an air tight container and refrigerate before using.

Chicken Spaghetti

Wednesday, March 30th, 2011


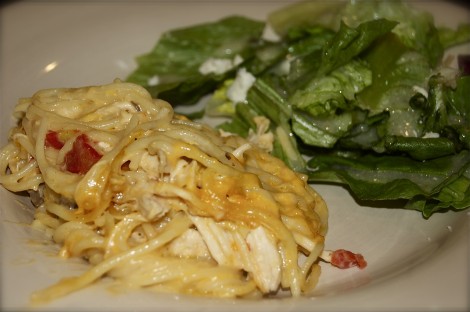
We have lots of potluck dinners at church…lots. Now, when I think of pot luck my first reaction is normally yuck. It’s a big table full of brown food. You have your few small bowls of veggies and a small bowl of salad that everyone is quick to put on their plate but doesn’t touch, but for the most part brown, high calorie but low in flavor food. Now, I’m not trying to be mean, I’m just speaking my mind and since this is my website I’m entitled to do that right?

So most people bring casseroles because they are easy to fix the night before and serve in one dish. I get it, I like my one pot meals as much as the next girl. I’m picky about my casseroles though. To me they are just a dish of mush that never looks pretty on a plate. Any casserole that I make needs to have some color and it needs to taste great. I think this one hits even my high expectations. It has color, lots of flavor and next to a big salad it looks pretty.

When I make this I like to double the recipe and put half in a casserole dish that I can freeze. That way when I need a quick meal I can pull it out and throw it in the oven.

Chicken Spaghetti
adapted from The Pioneer Woman’s recipe meshed with my best friend Jamie’s recipe

2 cups cooked, shredded chicken (boiled, grilled, bought from the store, however you like it)
3 cups dried spaghetti broken into small pieces
2 cans cream of mushroom soup
3 cups grated cheddar cheese
1 can ro-tel tomatoes
2 cups chicken broth
1 tablespoon seasoned salt
salt and pepper to taste

Bring a large pot of water to boil and cook your spaghetti until al dente. Remember you are going to bake this later so it will finish cooking then. Drain the spaghetti and combine will all the other ingredients in a big bowl except hold out 1 cup of grated cheese. Pour in one cup of chicken broth and stir together. Pour in the second cup if needed. It needs to be easy to stir but not juicy.

Dump the mixture into the casserole dish of your choosing and sprinkle the remaining cup of cheese on top.

Bake for 30-40 minutes until it is bubbly and delicious.

Yeast Rolls

Wednesday, March 23rd, 2011


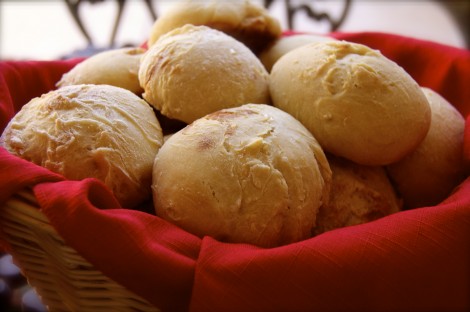
I made these back at Thanksgiving and they were a huge hit. They are soft and buttery and so tasty.

Just like any other yeast bread recipe though, patience is required in the baking process. They need several hours to rise and they need a lot of attention. I promise your patience will be rewarded. If you want to just make the dough and not bake the rolls yet that is perfectly fine. Just refrigerate the dough for up to two days and bake them whenever you want to. I always take an afternoon and bake all the rolls then wrap them up really well and freeze them. Then whenever we need bread for a meal I just pull them out a couple hours ahead of time and pop them in the oven for a couple of minutes before serving to warm them through. You’d never know they were in the freezer.

Yeast Rolls
adapted from The Pioneer Woman
4 cups milk (I used 2% and it worked fine)
1 cup sugar
1 cup vegetable oil
9 cups of flour
4 1/2 tsp dry active yeast or 2 packages
1 heaping teaspoon baking powder
1 scant teaspoon baking soda
2 tablespoons salt

Pour 4 cups of milk into a large pot. Add 1 cup of sugar and 1 cup of vegetable oil and stir to combine. Turn on the burner to medium and warm until little bubbles start to appear around the edge of the pot. Do not let it come to a boil. Turn off the burner.

Leave the pot on the stove and let it cool. Hot water kills yeast so we need it to come to lukewarm. It took mine about 45 minutes or so to cool off.

When it is cool add in 4 cups of flour and 4 1/2 tsp of yeast. Stir to combine. Add another 4 cups of flour and stir to combine. Place the pot in your oven (TURNED OFF) to stay warm and let it sit covered with a towel for an hour. It should double in size, if it doesn’t look like it has risen enough let it sit for another 30 minutes. When you are happy with how it has risen add another cup of flour, the baking powder, baking soda and salt. Stir until combined.

If you are not ready to bake the rolls then put the pot of dough in the refrigerator for up to 2 days. When you are ready pull it out of the refrigerator a couple of hours before you use it so it can come back to room temperature.

If you are ready to bake now, spray 3 sheet pans with non-stick spray. Form the rolls by pulling small portions of the dough out and forming them into about egg sized balls. Fill the sheet pans and let them sit covered with a towel for an hour to rise.

After an hour bake in a 400 degree oven for 18-20 minutes.

Throw them in a basket and serve or wrap them in plastic wrap and foil and freeze.
Potato cakes

Wednesday, March 16th, 2011


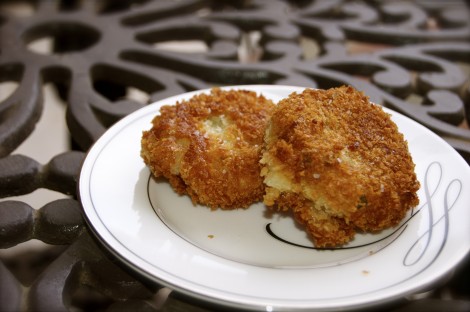
We first discovered these delicious potato cakes at one of our favorite restaurants here in town called The Garlic Press. They beautifully place these beside a juicy steak and perfectly cooked vegetables. We have been trying to recreate these for a long time now and just couldn’t seem to get them quite right. I think after lots of tweaks and changes we finally have a killer recipe.

One really cool thing about these cakes is they use leftover mashed potatoes. We always have leftover mashed potatoes and I really hate to throw them away, but they just really aren’t that tasty reheated. However, when you bread and fry them they are as good as fresh. Of course almost anything breaded and fried is great but that’s a different post.

For obvious high calorie reasons I don’t make these very often, but when we do splurge it is well worth it. I really don’t have measurements for this recipe because it really depends on how much leftover mashed potatoes you have and how many cakes you want to end up with.

Potato Cakes

leftover cold mashed potatoes
grated raw potato
chopped chives
a couple of eggs, beaten
panko bread crumbs
garlic salt
salt and pepper
oil for frying

Pour your oil into your frying pan until it is about 1/3 of the way up the pan. Heat on medium high heat.

To prepare your frying ingredients beat a couple of eggs and add some salt and garlic salt. Also pour some Panko bread crumbs into a plate and mix with some salt.

In a bowl combine your mashed potatoes with some of the grated potato and some chopped chives. I made eight potato cakes and it took 1/2 a potato. If you plan on making more depending on how much mashed potatoes you have leftover you may use a whole potato. Shape into small cakes or patties making sure they come together tightly.

One at a time drop your potato cake into the beaten eggs, remove and place them into the Panko bread crumbs. Coat the entire potato cake with the bread crumbs and place into hot oil.

Cook until both sides are golden brown and remove onto a plate with paper towels to soak up the extra oil.

Salt the cakes and enjoy.

Hot Cocoa

Wednesday, March 2nd, 2011


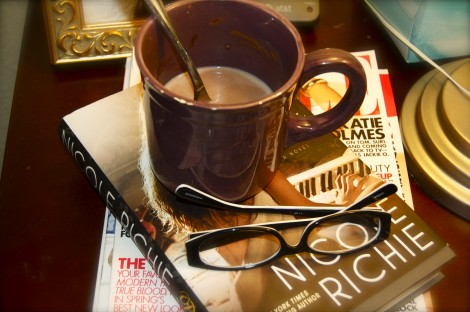
Any time I think about hot cocoa I think about being in New Mexico at a ranch we used to always go to with our youth group. We would sit around the fire in the most comfortable couches and drink the best hot cocoa ever. I think it was just package hot cocoa but for some reason it tasted so much better by the fire in the mountains.

We came across this recipe one night while we were watching tv. There wasn’t anything on and we had food network on. I don’t think either of us were actucaly paying attention to the tv but as soon as AB started making this he had our attention.

Hot Cocoa
adapted from Alton Brown


2 cups powdered sugar (if you like your’s really sweet you may add a little more)
1 cup unsweetened cocoa powder
2 1/2 cups powdered milk
1 teaspoon salt
2 teaspoons cornstarch
1 pinch cayenne pepper, or more to taste (trust me it’s good)
Hot water

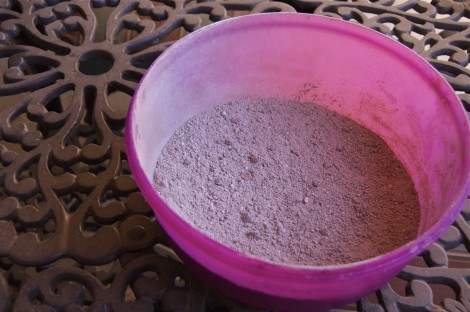
Combine all ingredients in a mixing bowl and mix well with a whisk. In a small pot, heat 4 to 6 cups of water.

Fill your mug half full with the mixture and pour in hot water. Stir to combine.

Seal the rest in an airtight container, keeps forever in the pantry. This also works great with warm milk.

2025 © Mandy and Jace is proudly powered by WordPress
Entries (RSS) Comments (RSS) | Esther Theme By Patrick